Email Campaign
- 1.
Overview:
The good old way of reaching to your users—has stood the tests of time and still works as good as the other ways, if not better. Unlike push notifications & in-app messages, Emails will be there in your inbox until you clean it up. Unless the email seems like too promotional, it’s hard not to click and read them. - Common Email Use Cases:
- (a)Drip campaigns that will keep on getting delivered in your users’ mailbox periodically unless specified otherwise
- (b)Newsletters, updates, features and deals that are important and must not be missed
- (c)Information sent through push notifications and in-app messages that they may have missed out on
- 2.
Getting Started:
To start launching email campaigns, you will have to configure your app with the email settings here.
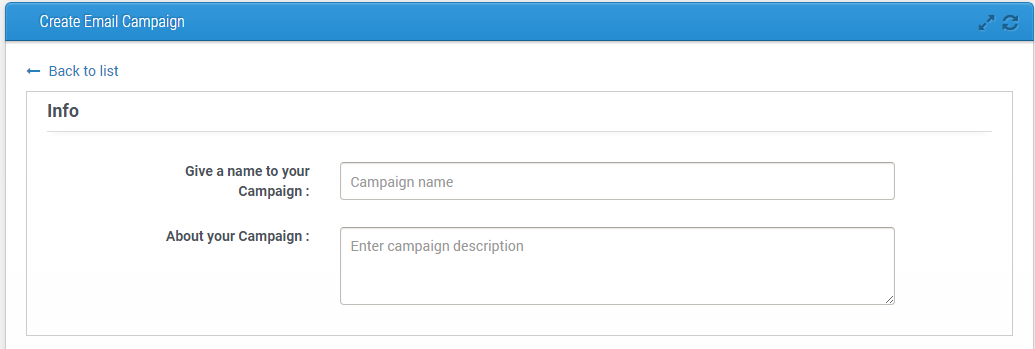
- 3.
Name Your Campaign:
Always a good idea to give a relevant name and description to your campaign, for it will be easier for you to keep track of all them just by looking at their names. - 3.1. Super Properties: These properties are basically related the platform from which the event are triggered such as OS, OS Version, Carrier, Brand Model etc. These are automatically extracted by the SDK and added to the event request before sending it to server.
- 4.
Select an Audience:
You could choose the entire user list for, let’s say, a very generic announcement or message, but it is always better to send personalizeEMail to each segment. You can either choose an already created segment or create one right here. 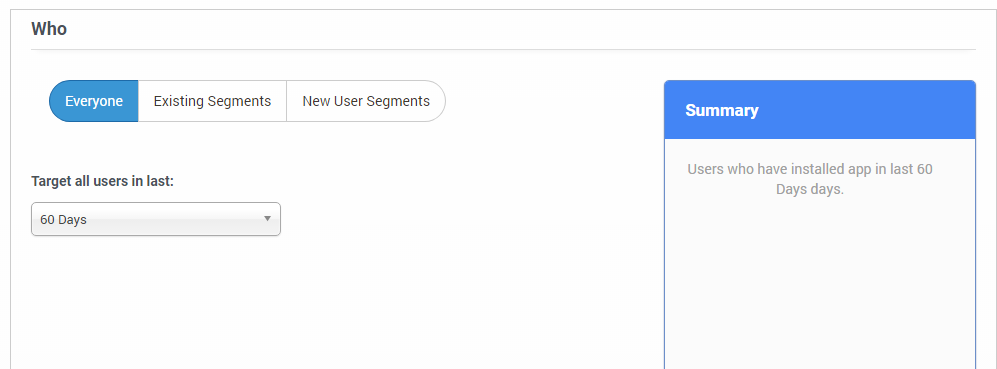
- 5.
Configuration:
Growth Hack API helps to increase your application users by referring application through different applications. It also helps to earn or reward management to those users. You can create Virality Campaign on AppHQ Dashboard, also you can manage the reward points distribution against these campaign.To begin with, choose the provider you would like to send emails through. App42 MA by default comes with two providers—App42 & Mail Gun. App42 is simply a way to send mails through third party providers which can be configured from here. - If you choose App42: Select the email ID you have configured in the settings to send emails from. You can mask the sender email ID with the one of your choice in Email to be Shown. For instance, if the sender email is abc@bde.com, you can show the sender email as xyz@abc.com. Enter the sender’s name in the placeholder provided, and the reply-to address if you would like your users to send their responses to some other email ID.
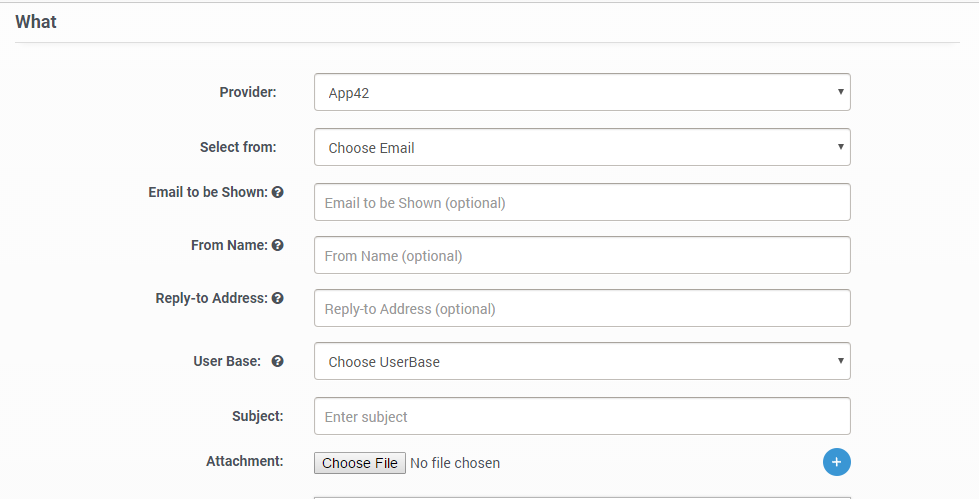
- 6.
User Base:
This is an important step in order to finish the configuration of your email campaign. There are 3 user bases to choose from: - (a) App42 User Service: If your app is using our App42 User Management Service, you can safely choose this user base to go ahead with
- (b) App42 Logged In User: If your app users have super property configured, you can choose this option—here email will be sent to only those users whose email ID is available
- (c) User Property:

- 7.
Message:
After you have entered the email subject and attached required files, start creating your message. This is rich media editor where you can create visually appealing email messages. You have an option to manage everything through the editor or paste the HTML code of your own. 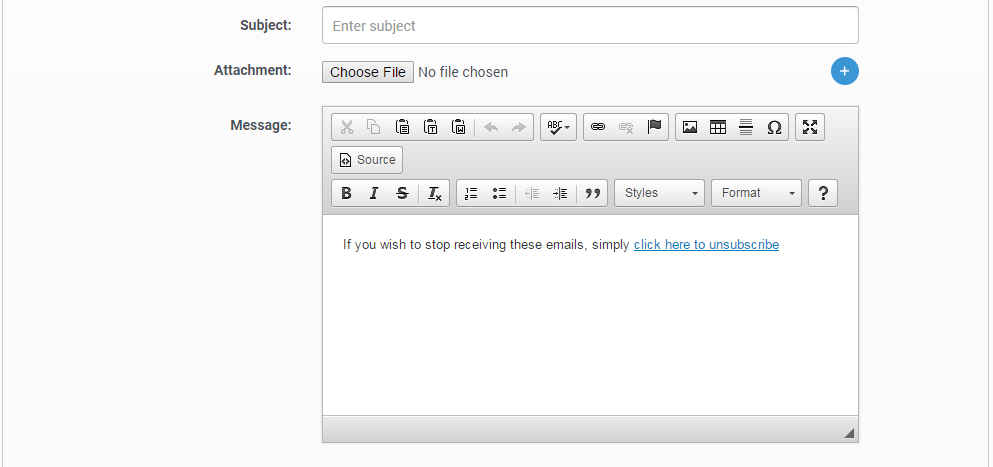
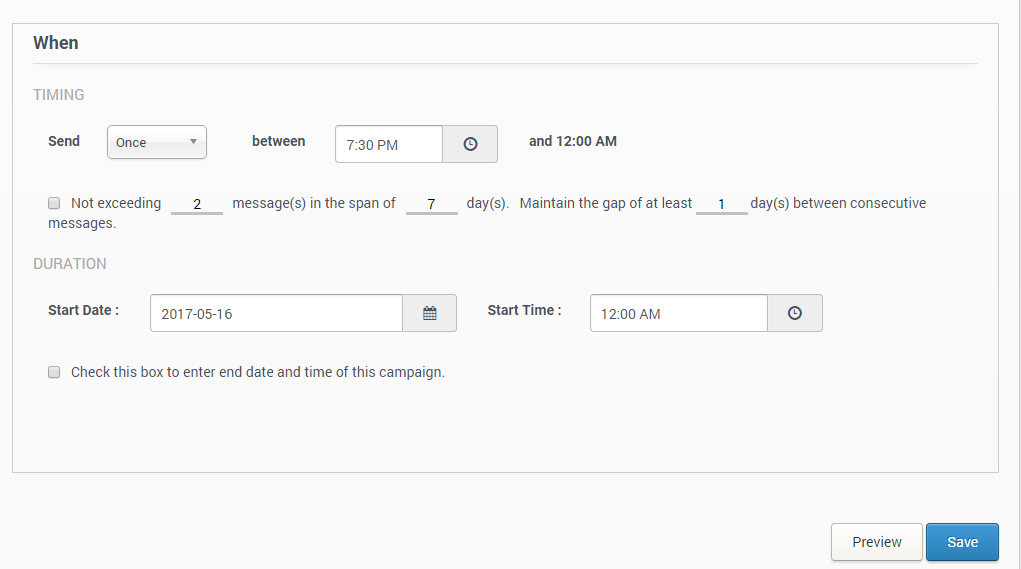
- 7.
Scheduling:
There are various ways you can schedule your Email campaign. If you choose: - (a) Daily: The email will be sent to users daily at the selected time as soon as they trigger the event.
- (b) Alternate: The email will be sent every alternate day at the selected time to the segmented users as soon as they trigger the event.
- (c)
Weekly:
Select your preferred day, the email will be sent to users every week on that day at the selected time as soon as they trigger the event. - (d) Monthly: Select your preferred date, the email will be sent to users every month on that date at the selected time as soon as they trigger the event.
- (e) Yearly: Select your preferred month and date, the email will be sent to users every year on that month and date at the selected time as soon as they trigger the event.
- Click to preview your entire campaign. Click on Save to launch.